Even though I don't think the Rega EAR is worth the purchase new, I decided to put in information for those of you who may already own a Rega EAR and are kind of curious about getting into making your own modifications. This is actually a device that will be simple to mod for a few bucks which can actually yield some serious benefits.
Tools you'll need:
- Metric Allen wrench set
- Phillips screwdriver
- Soldering Iron
- Solder Wick
- Solder
You'll need the metric Allen wrench set to remove the front cover. You'll just strip them otherwise, they are on tight.
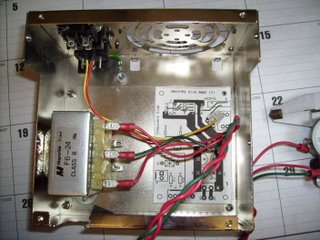
Take the back plate off. Before you do anything else, measure the space between the top of the board and the case. You'll need this to make sure you don't buy caps which are too tall.
Disclaimer:If you read instructions on the internet and follow them without accepting responsibility for your actions, or without really knowing what you are doing and hurt yourself, burn down your house, ruin your stereo or go stark raving mad and start attacking your neighbors lawn mower with an ax while naked in the middle of winter, you are a certifiable dufus and should read no further.
If on the other hand you realise that you are taking risks for the functionality of the equipment you are modifying, and your own health and safety, and will take full responsibility for the consequences of your actions and you are not going to try to act like a dufus by blaming the author of this or any other article online, then please continue.
Capacitors
First, a note about how capacitors are measured. There are three mesuarements which are usually important. Capacitance, Voltage and Temperature. Capacitance is the only value which affects how the part works in circuit. Voltage and Temperature affect when the part will fail. If you put a cap in with too small a voltage rating, it will break down very quickly. For this reason, you can increase the voltage and temperature grades on a capacitor relatively safely. On the other hand, going too far over in voltage may cause you to use a part too physically large, which will be more inductive and may not physically fit. For instance, it's ok to replace a 35V Cap with a 50V or 100V cap. There are cases when the manufacturers original parts were rated too low (see my posts on the Tandberg 3001 power supply) in which case a voltage upgrade makes a really good idea. I don't think you'll find this a problem with the Rega.
One thing to be careful of is that electrolytic capacitors have a direction they should be used in or they will fail fast. Observe how they are mounted in the original, look for (+) signs on the silk screen. Make sure the (-) mark on the capacitor goes to the opposite pin.
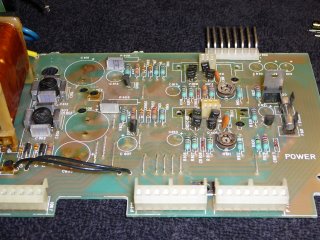
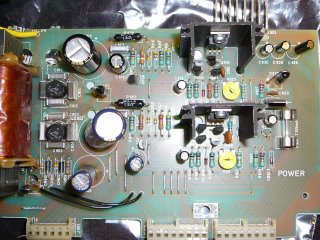
Take every electrolytic you see, and replace them with Panasonic FM capacitors, available from Digikey. You should leave the values the same except for the the power supply and output caps. The power supply filter caps are the two large caps rated 1,000uF right next to the power supply jack. Buy the largest cap you can fit into their place. If you can fig 1,800uF you should. This isn't just upgrade-itis. This unit has some serious hum, the only way to remove it is going to be to increase the filter capacitance. By putting in low inductance caps, we can also hope to reduce some of the hiss as well.
For the output caps, putting in bigger units will give you better bass, at the expense of increased inductance and less treble. I suggest that since the Pana FM caps are so low in inductance anyway you should upgrade these by 10-20% if they will fit. You should be able to fit a 0.1uF metal poly film cap underneath each output capacitor. Check the case to board spacing first though.
For all other electrolytic caps, match the original uF values. Leave the ceramic and box caps alone.
FuseAfter adding significant capacitance to the power supply you may blow the little fuse near the jack. Ce est le vie. Short the puppy and move on. Ok, no,
just kidding. If this problem arises I would seriously do is add a fuse jack to the back of the unit, and wire it to where this thing is. Then try to put the smallest fuse which doesn't fail when you power the unit on. Somewhere around 200mA to 315mA 5x20mm fuse should work.
You can check the on board fuse for failure by testing the AC voltage across it. It should be near 0. If it's the same as the voltage coming from the wall wart, it's blown.
Op-ampThe single chip in the middle of the board towards the back is an NE5532 dual operational amplifier. Rega probably picked this particular op amp because it makes the rest of the circuit incredibly easy. Let me explain. For an op amp, the 5532 has very low output impedance and is able to drive 600 Ohms to +- 10 V easily. This means they can buffer the input and drive the current gain stage directly, without any more parts. In other words, it's the cheapest possible solution they could find and still have a large current gain capability.
Remove it and replace it with a high quality machined IC socket. This single upgrade is going to give you the most amount of fun, because you'll then be able to experiment with a variety of different dual op amps until you find the one that you like best without having to pull out the solder gun each time.
I suggest the first good one to try is an NE5535. It's probably got the closest sound of the NE5532, but with smoother, richer detail, while still being a rather "cold" part. Philips released it as a Class-A biased version of the NE5532, but I don't think they even bothered to use it in their own products very much and it consumed higher power so except for the modifications market it didn't make much of a dent in the market. I believe Walt Jung (Walt, e-mail me if I'm wrong) wrote about this being a marvelous upgrade to the 5532, but I cold be mistaken. Mouser and Digikey no longer carry it but I found some at
ICPlus. Keep in mind that the 5535 does not have the current gain capability of the 5532, so if you have very low impedance headphones, this may not be a good choice, however, several Burr Brown
In any event, once you have socketed the op amp you should be able to find a long list or audiophile recommended parts that will fit, including some who make adapter boards so you can use some of the very expensive Burr Brown single op amps in the socket. Being able to hear the effect different op amps have may alone be a reason to mod the EAR. Here is a good resource for op amp replacements:
Tangentsoft Op Amp ListAlso, take a look at the op amp pins. I believe there are a couple of unused part locations which were meant to be filter caps but are now marked N/C. You can tell because one of the cap pins will connect to pin 4 or pin 8 of the op amp. If this is true, put a 10uF to 22uF Pana FM cap in each. Pin 4 should connect to the capacitors (-) side. Pin 8 to the (+) side.
Final WordsLike I've said, the Rega EAR is not worth purchasing for the sake of upgrading it. If on the other hand you already have it, you want to learn how to do things yourself, and you are happy to spend about $30 in parts in teaching yourself and your ears how different components affect your sound, then you are in an excellent place. Please let me know how your experiments turn out.

